GeoHealth Mapping GIS Training
for Monitoring and Evaluation or
Strategic Information Officers and Data Analysts for HIV

4.2. Georeferencing Raster Data
Georeferencing means to associate something with locations in physical space. In GIS, it is the process of associating a physical map, or a raster image of a map, with spatial locations (coordinates) so that the raster data can be viewed, queried, and analyzed with other geographic data, or used to create geographic data.
This section demonstrates how to locate a study area on Google Earth and export and georeference the image in QGIS.
4.2.1 Objectives
- Learn how to search for an area of interest in Google Earth
- Learn how to create control points and save as a .kml file
- Learn how to import a .kml file into QGIS
- Learn how to georeference an image in QGIS
You will need the files for Section_4_2 to complete this module.
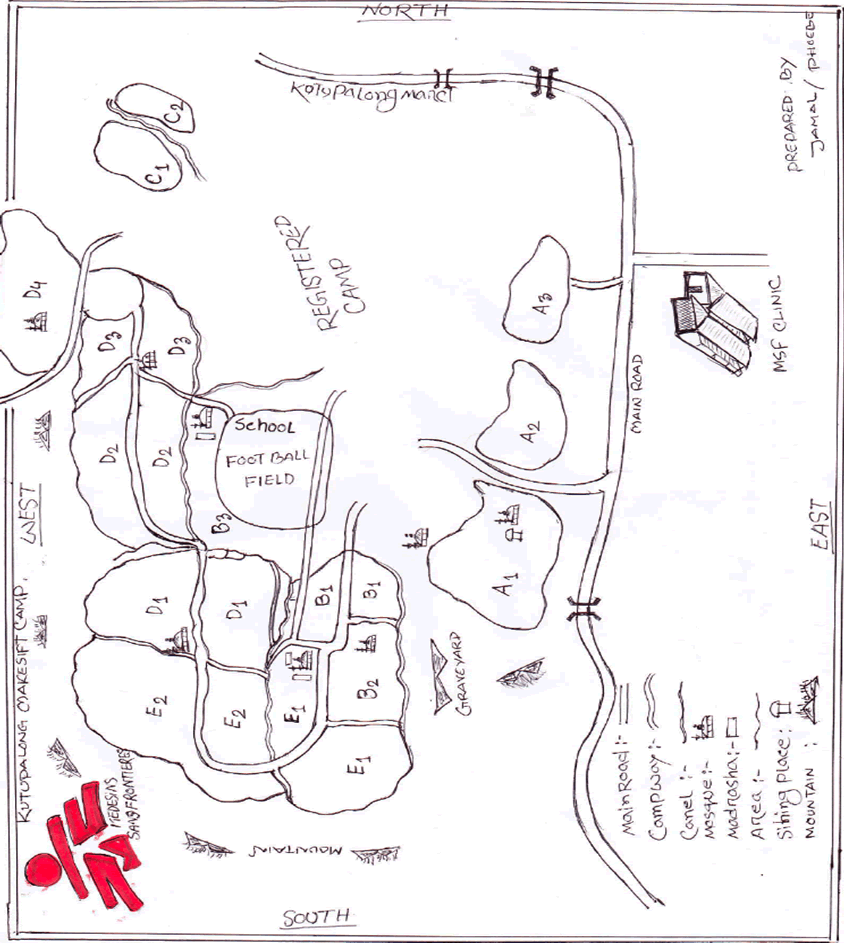
Our study area in this exercise is a makeshift refugee camp in Kutu Palong, Cox's Bazaar district in Bangladesh. Monitoring has been conducted on the spread of measles in the refugee camp and the surveillance team would like to map and monitor the spread of infections over time.
A rough sketch of the camp was created (figure 1) but this image has not been georeferenced; as it was not drawn to scale, we cannot georeference it as is. Instead we must conduct the following main steps:
- Use Google Earth Pro to locate the camp, save an actual image, and then georeference the image of the camp.
- The georeferenced image will then be digitized to create a vector layer (using the rough sketch of the camp layout as a guideline).
- Once we have our vector layer, we can link key attributes to this layer (such as onset data, number of infections, etc.).
- We can then conduct some spatial analysis on this dataset or choose an appropriate method to display the changes in the outbreak over time.
Note: Google Earth is a virtual globe that displays satellite images of the Earth's surface, at varying resolutions. It allows users to save a snapshot of a current view (area of interest) as a *jpg image file. However, the saved image is not in any real world coordinate system, so it must be georeferenced.
4.2.2 Start Google Earth Pro
- Launch Google Earth Pro from the shortcut on your desktop.
- In the search box, type in Kutu Palong. A list of names will appear.
- Select Kutu Palong, Cox's Bazar - Teknaf Highway, Ukhia, Chittagong Division, Bangladesh and click the Search button

- Google Earth will zoom in to the search area selected.
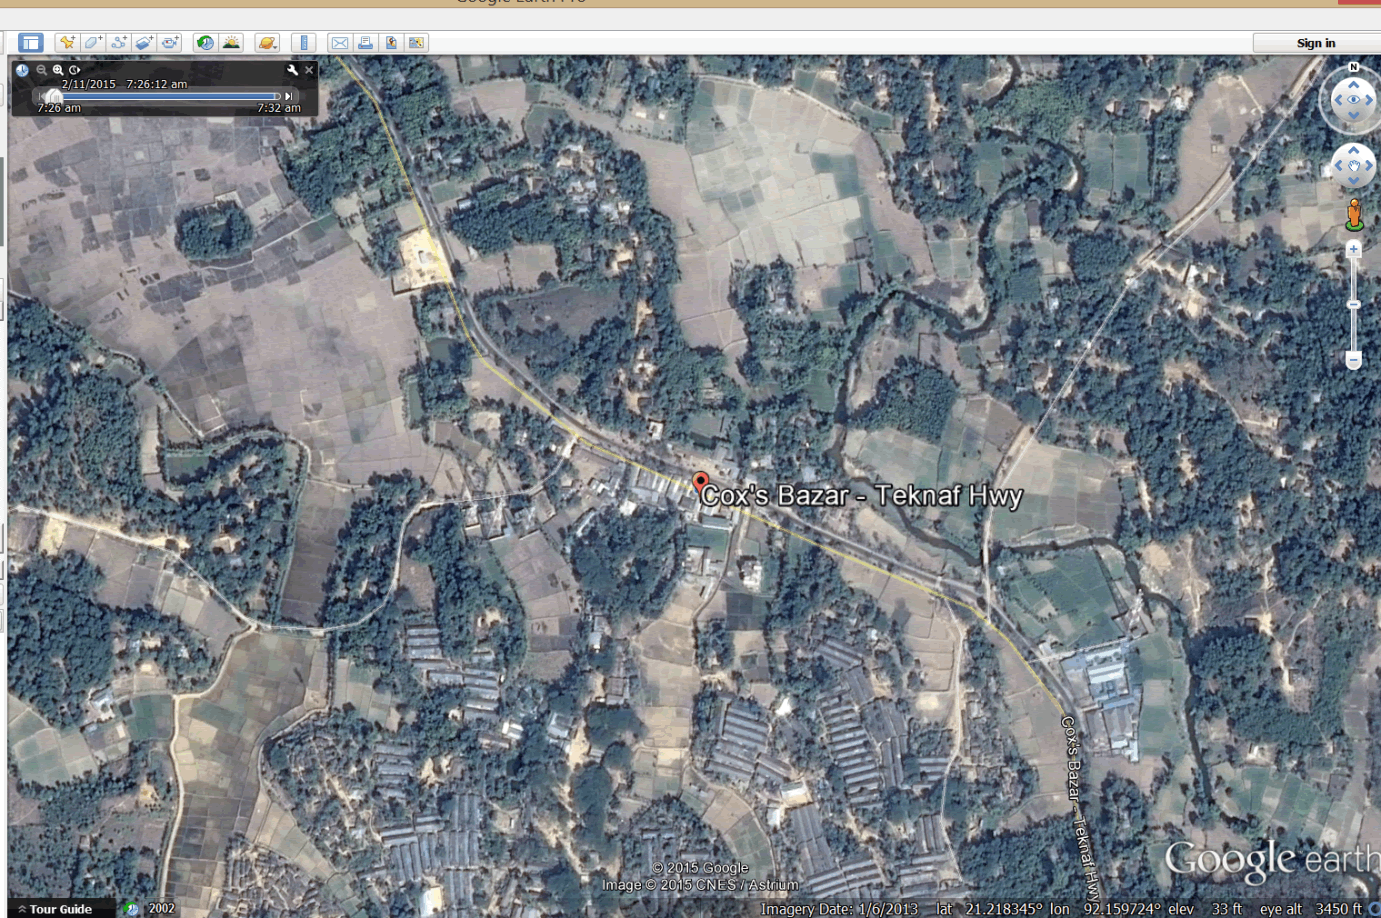
- Part of the refugee camp is visible on the map.
- Pan down to locate the area of interest. Your screen should resemble the graphic below
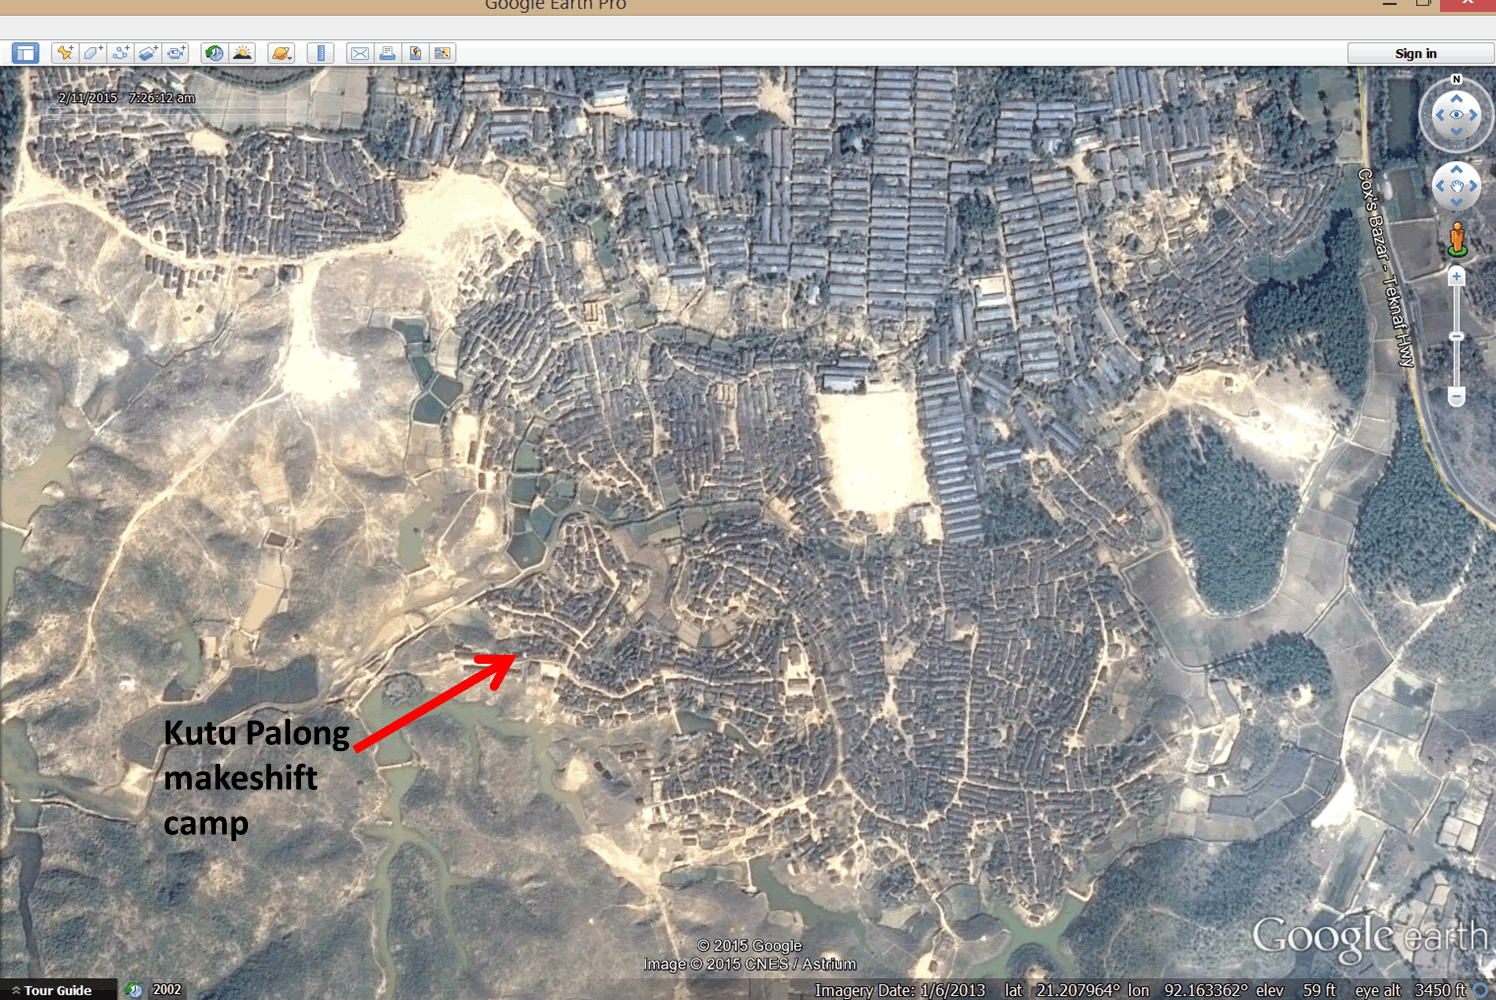
- The entire camp is not visible. Zoom out using your mouse scroll wheel. (A forward movement will zoom in, while a backward movement will zoom out.) You can also use the Google Earth navigation buttons to zoom in or out

- Zoom out to an extent similar to the graphic below.

4.2.3 Create control points for georeferencing
In order to georeference an image, you need a minimum of four control points. Control points are a set of locations with known X,Y coordinates. As mentioned at the beginning of this exercise, georeferencing is the process of associating a physical map or raster image of a map with spatial locations (coordinates). We will create four control points or spatial locations for use later in the exercise to georeference the image. The control points must be at four corner locations of the image and, as a rule, are selected at the intersection of features. Control points could include road intersections, river intersections, or corner locations of buildings, fenced areas, etc.
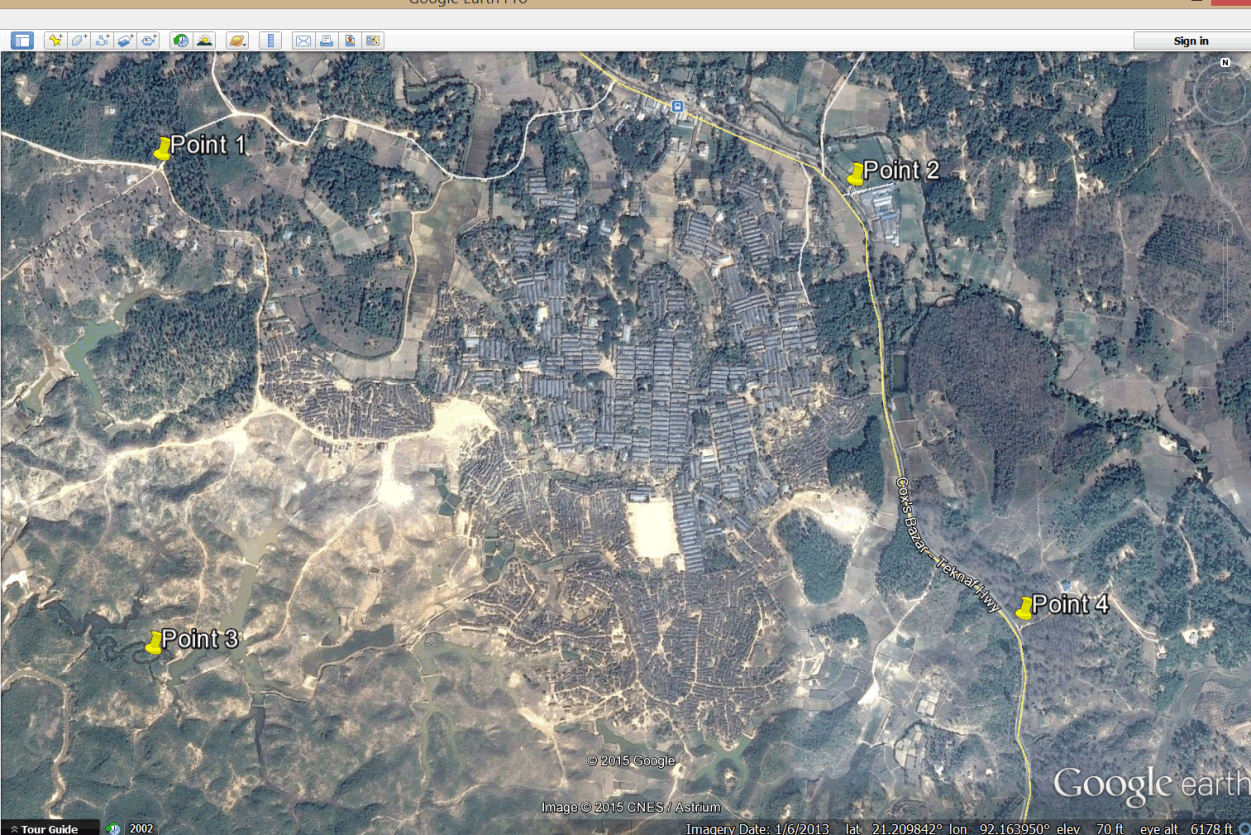
Four points have been identified for this exercise. We will zoom to each point and create our control points. See image below.
Jump back to directions for: Point 1 Point 2
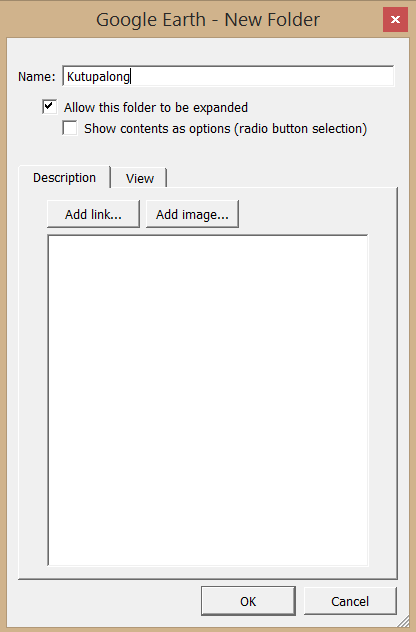
- On the main menu, select Add > Folder. We will create our control points in this folder
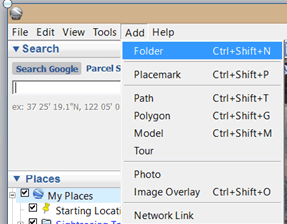
- In the New Folder dialog box, type Kutupalong as the name of the folder
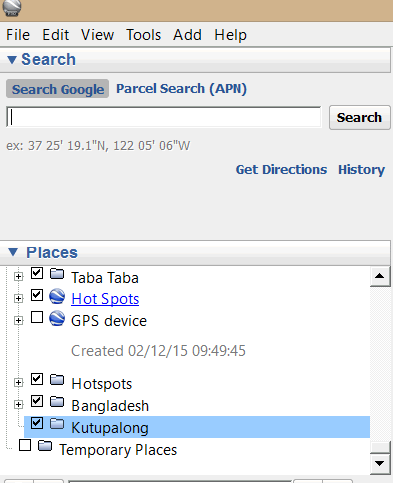
- The folder has been added to the Places panel
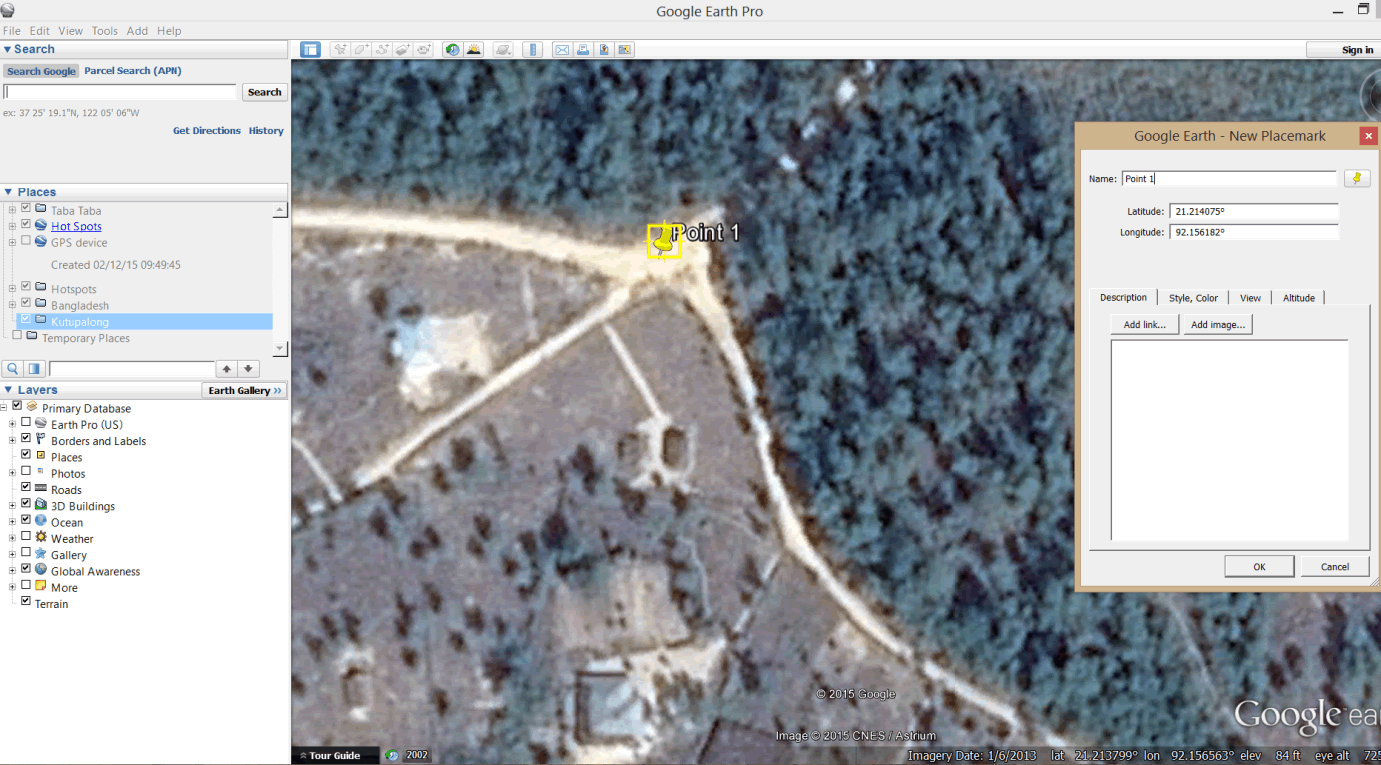
- Zoom to control point 1. Refer to the image at the start of this section, which identified the four control points.
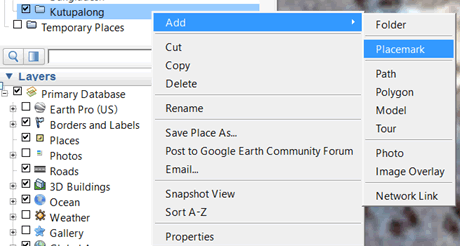
- Right-click on the Kutupalong folder and select Add > Placemark.
- A yellow placemark symbol should appear. If it is not visible, move the New Placemark dialog box.
- Move the yellow placemark to the location shown below. Change the placemark Name to Point 1. Click OK to close the dialog box
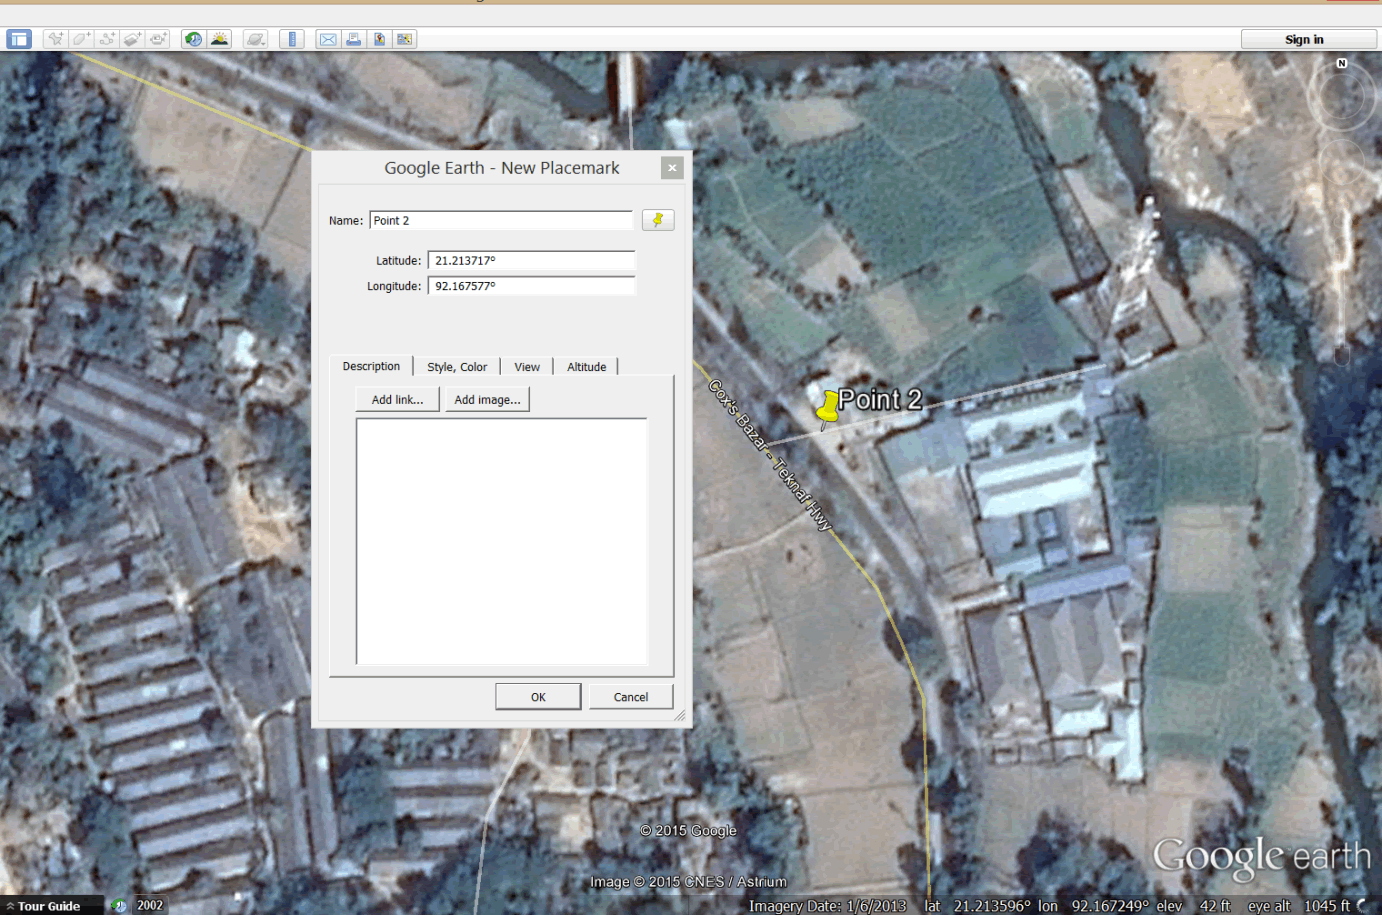
- Zoom out and then zoom in to the second control point. Again, refer to the image above.
- Right-click on the Kutupalong folder and select Add > Placemark again. Move this placemark to the location shown and name this Point 2
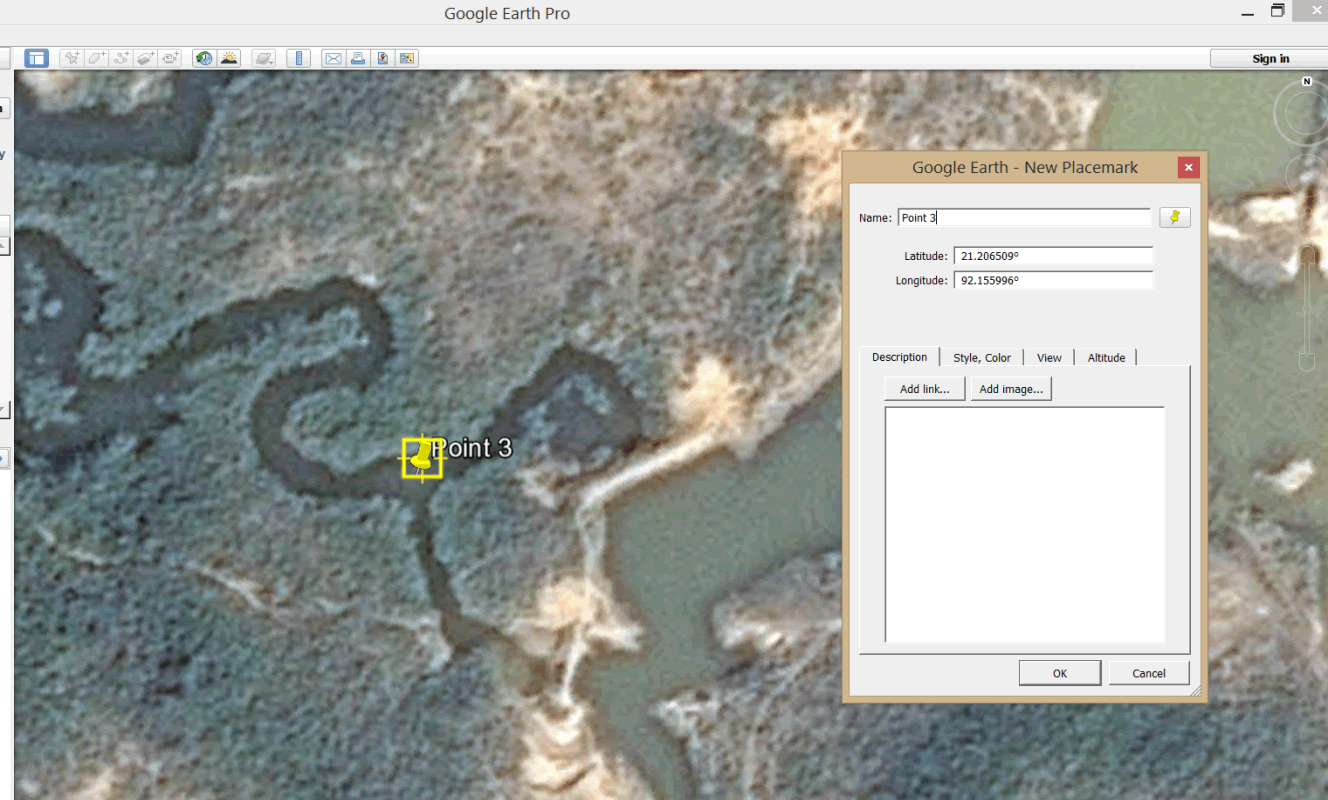
- Create the remaining two control points. Refer to the images below.

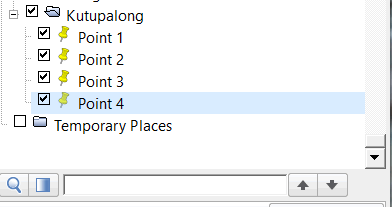
- Your four points are now added in the Kutupalong folder
- Zoom out so that the four control points are visible on Google Earth. Try to match your zoom extent to the image below.
4.2.4 Export image
- On the main menu, click on the Save Image button. This opens up the save menu tool bar.
- Click on Resolution and select Maximum (4800x2905).
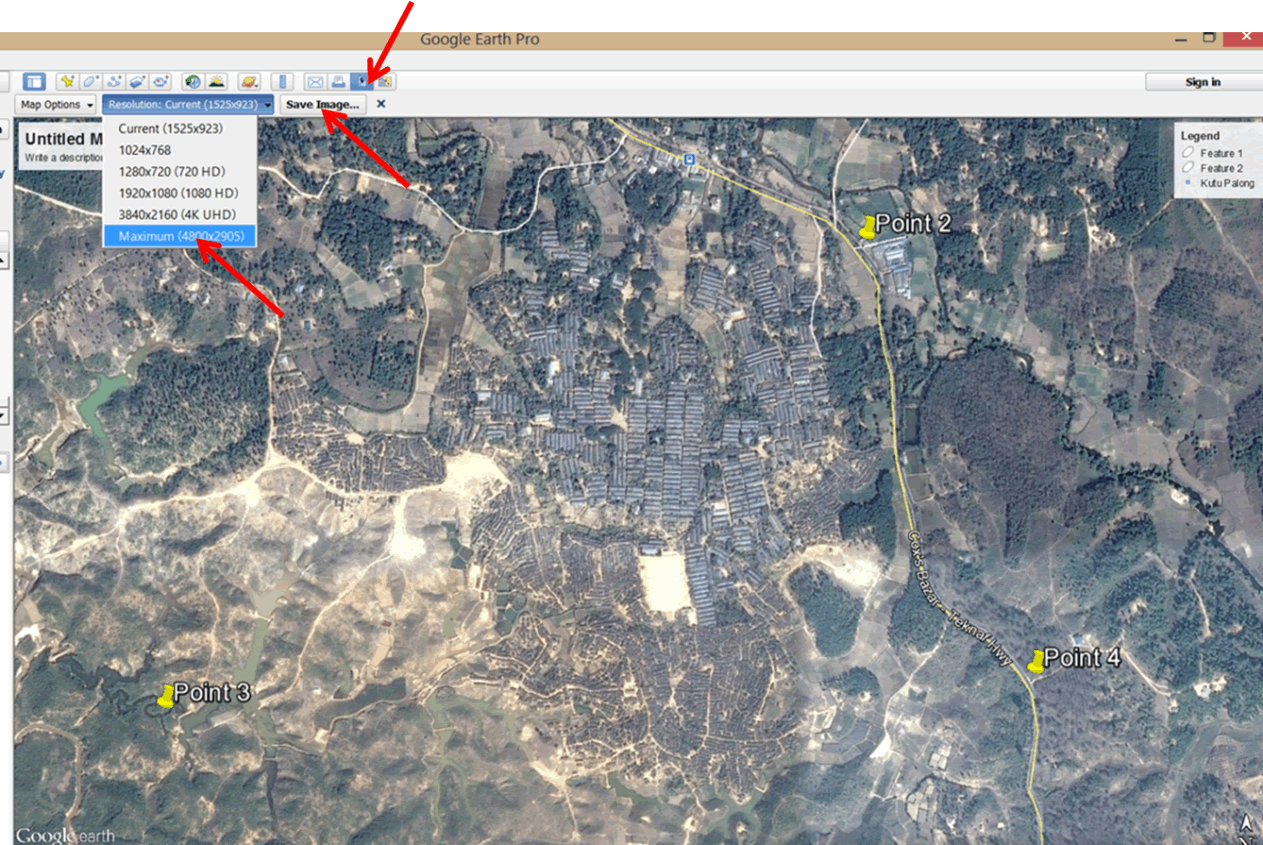
- In the toolbar, click Save image.
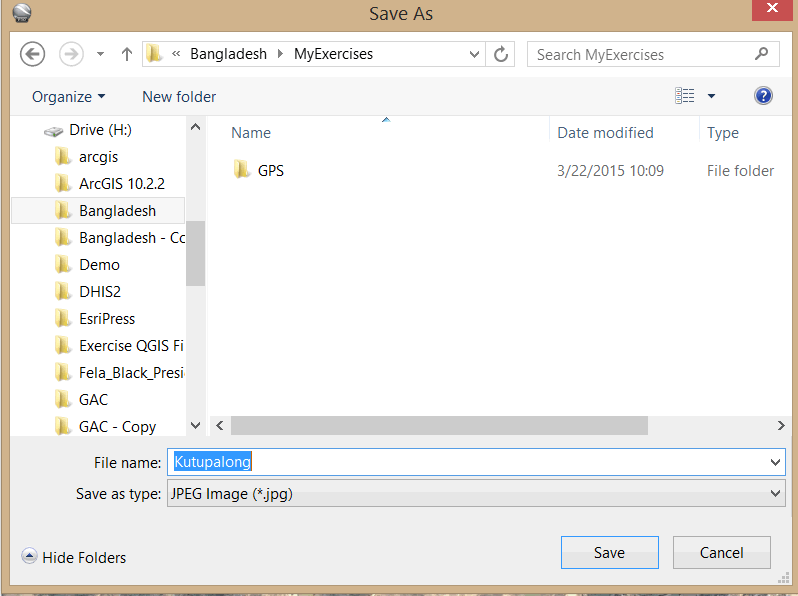
- In the dialog box that opens, save the image file as Kutupalong.jpg in the MyExercises folder.
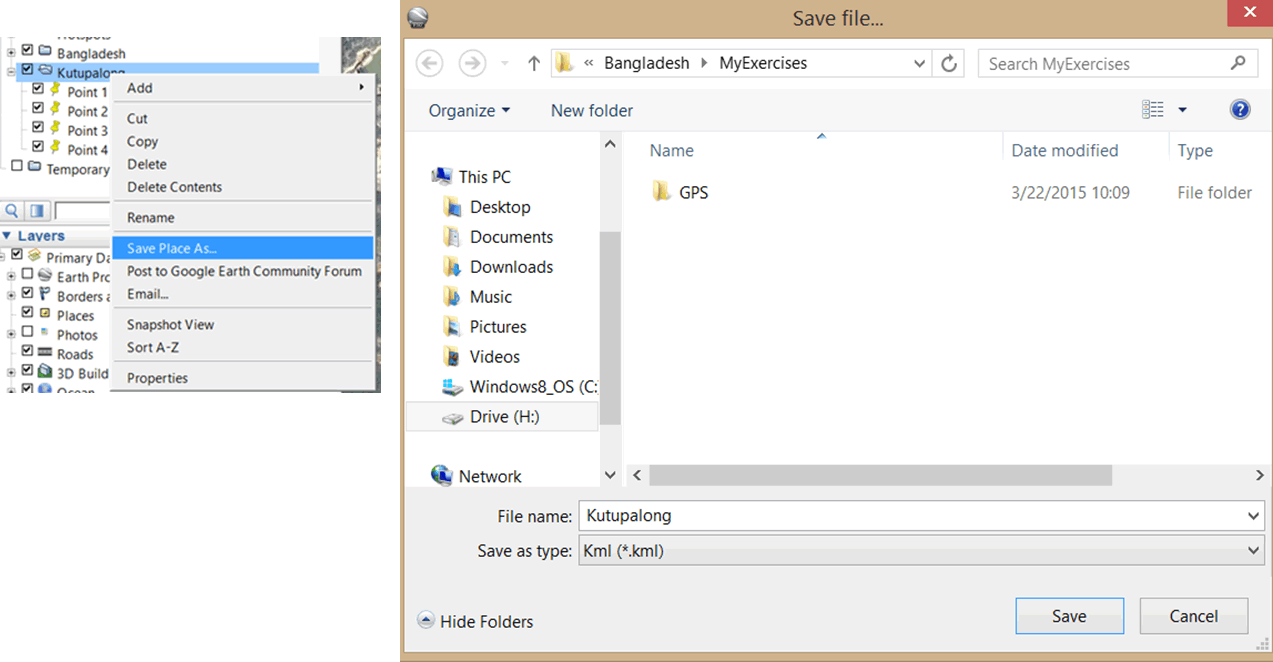
4.2.5 Save control points as a *kml file
- The next step is to save the control points as a *kml file, which we will import into QGIS.
- Right-click on the Kutupalong folder and select Save Place As.
- Save the place as Kutupalong.kml in the MyExercises folder.
4.2.6 Launch QGIS and import *kml file
- Launch QGIS.
- On the main menu, select Layer > Add Layer > Add Vector Layer.
- Browse to your exercise folder. Change the file type to Keyhole Markup Language.
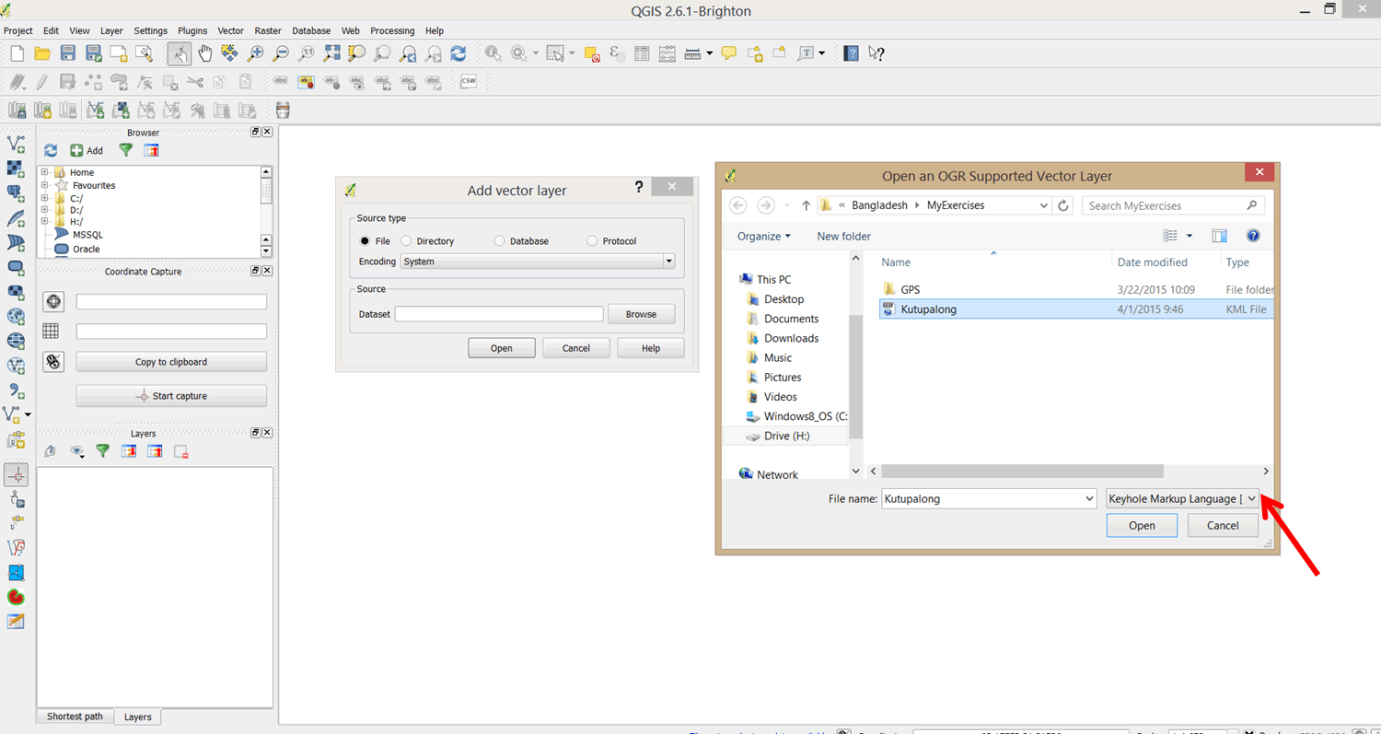
- Select Kutupalong and click Open.
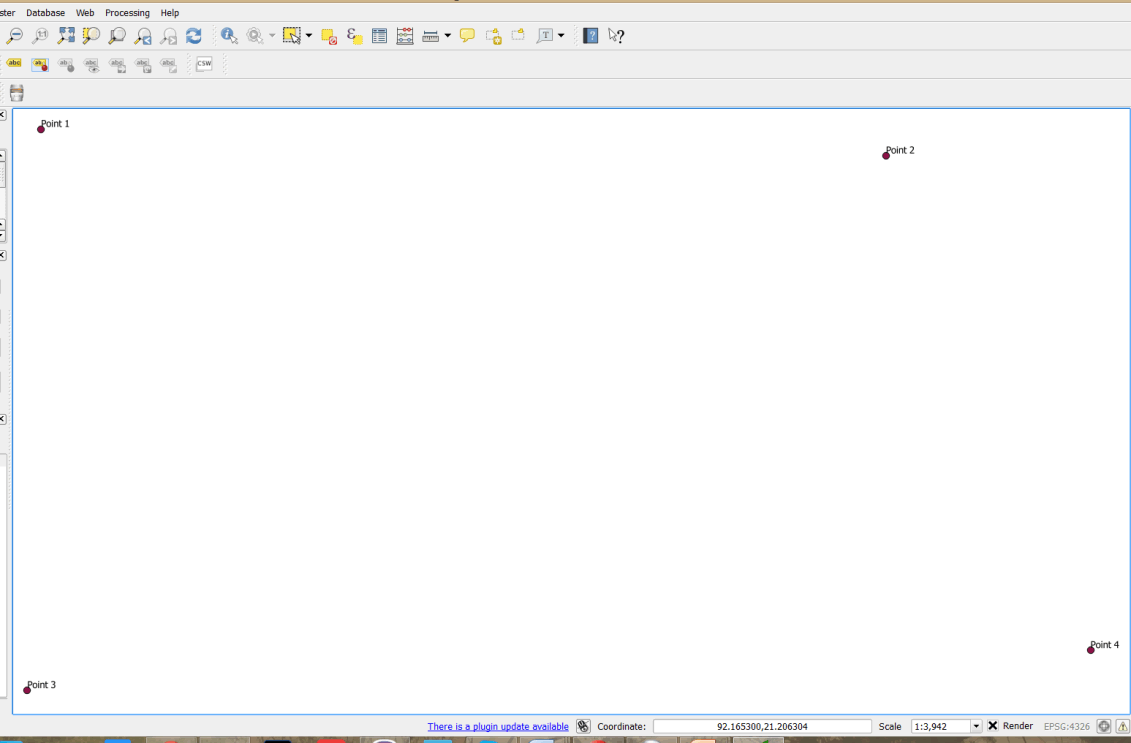
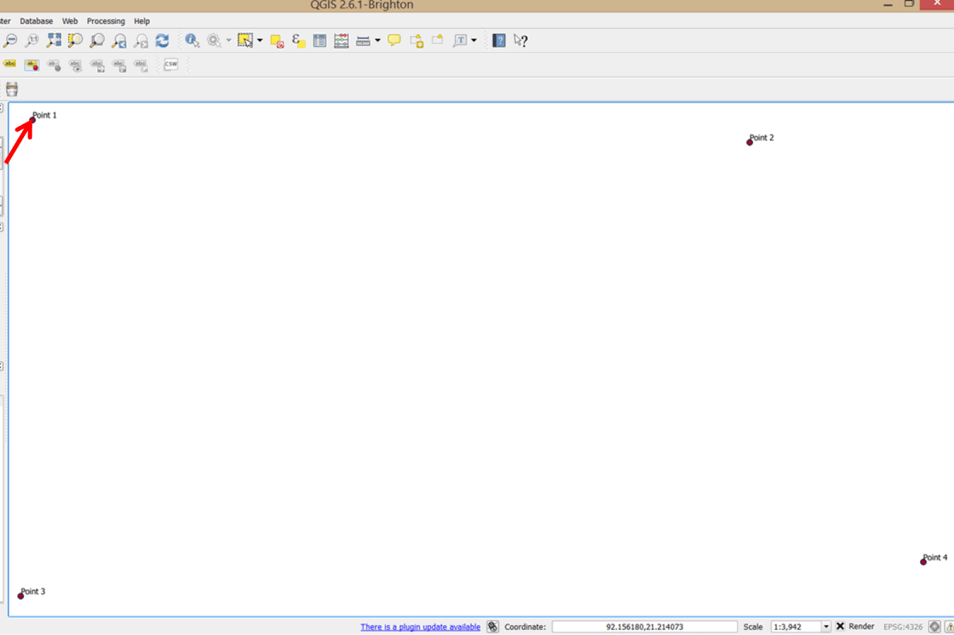
- The four control points are added to your map. Add labels to the control points.
In QGIS, georeferencing is accomplished using an external plugin called Georeferencer. This is generally installed by default in recent versions of QGIS.
- In order to activate the Georeferencer plugin, select Plugins > Manage and Install Plugins from the QGIS main menu.
- If the plugin installer is open for the first time, it will search for a repository, which might take a minute. Please wait.
- In the Plugins window, select the All option to show all available plugins; click the box next to Georeferencer GDAL toactivate the plugin.
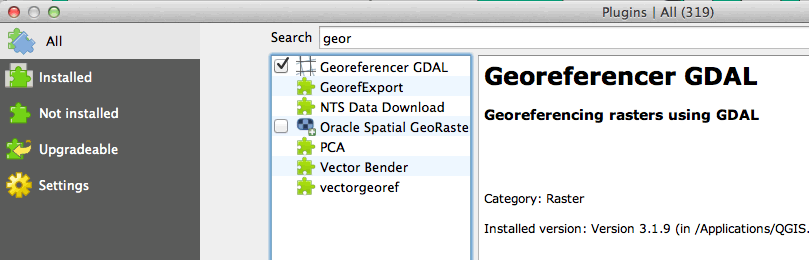
- Close the Plugins window.
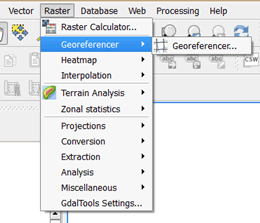
- To open the Georeferencer tool, click on the main menu and select Raster > Georeferencer.
- Add the ungeoreferenced image Kutupalong.jpg to the Georeferencer window, using the Open Raster command
 in the top left corner.
- In the Coordinate Reference System Selector dialog, select WGS 84. This tells QGIS to correctly locate the coordinates according to the GCS_WGS_1984 reference system, which is the same as the one used in Google Earth

- The image will be displayed in the Georeferencer window. Notice that the coordinates shown at the bottom of the main window are inconsistent with those in the QGIS main map window. This indicates that the image is not located correctly geographically
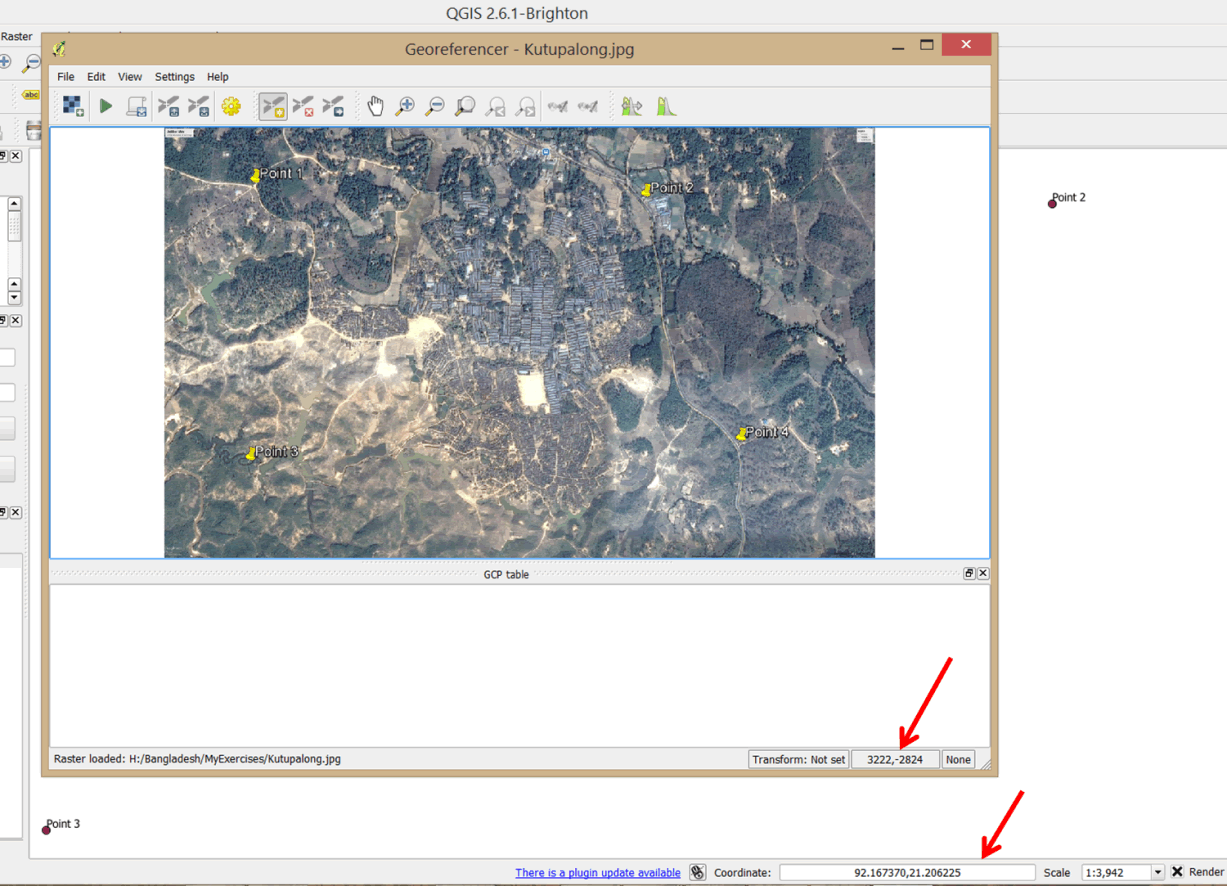
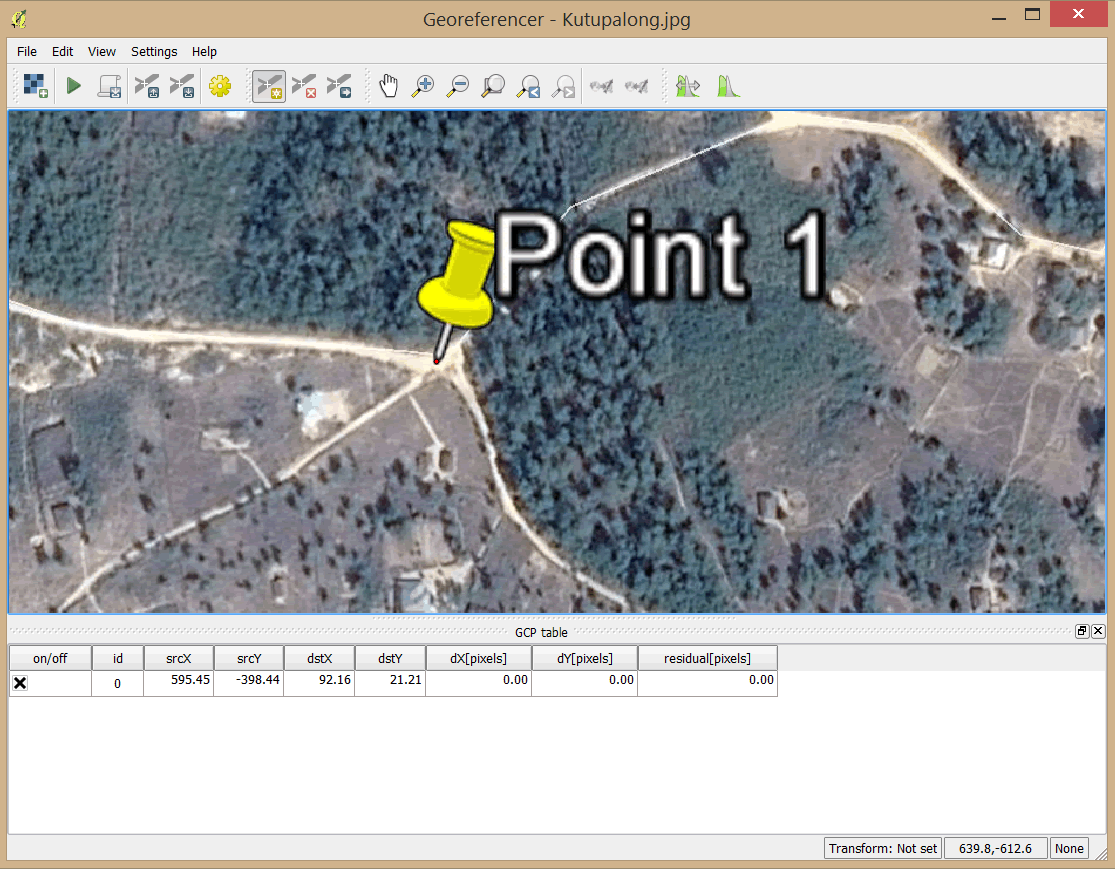
- Zoom to Point 1 in the image.
- Click on the Add point button on the menu bar, then click at the bottom tip of the yellow place marker of Point1 (see below).
- This opens the Enter map coordinates dialog box.
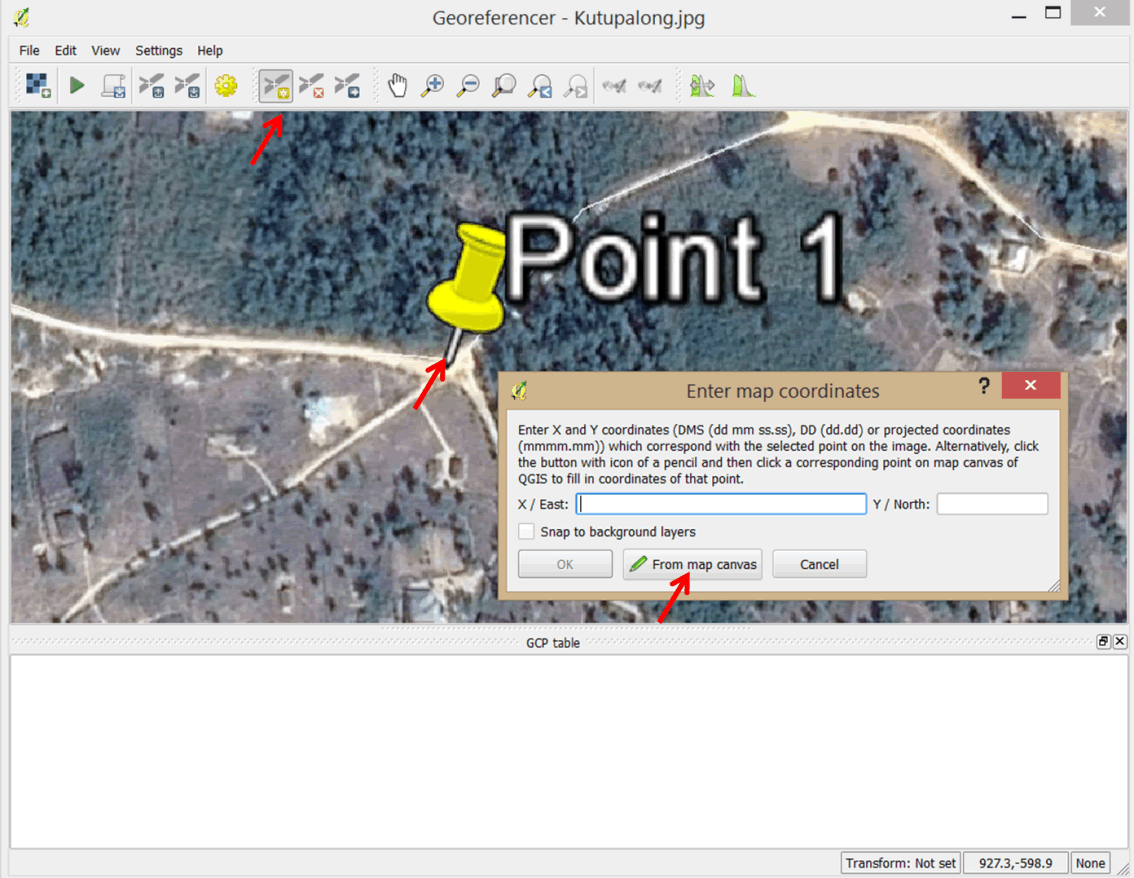
- QGIS gives you the option of typing in the known coordinates of the control point or obtaining these from the map canvas. In our case, we already created control points in Google Earth, which we will use here.
- Click on the From map canvas button

- This takes you to the QGIS map canvas where you have the four control points.
- Click on Point 1
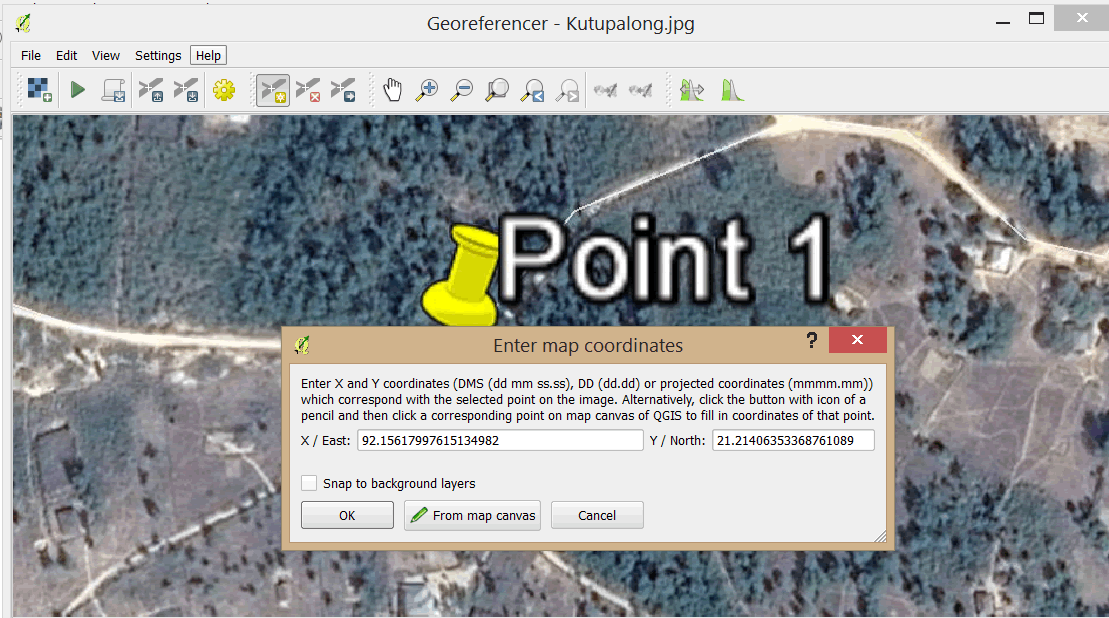
- This action automatically takes you back to the Georeferencer. Notice the X,Y coordinates have been filled in for you by the tool.
- Click OK. Your control point has been added to the GCP (Ground Control Points) table
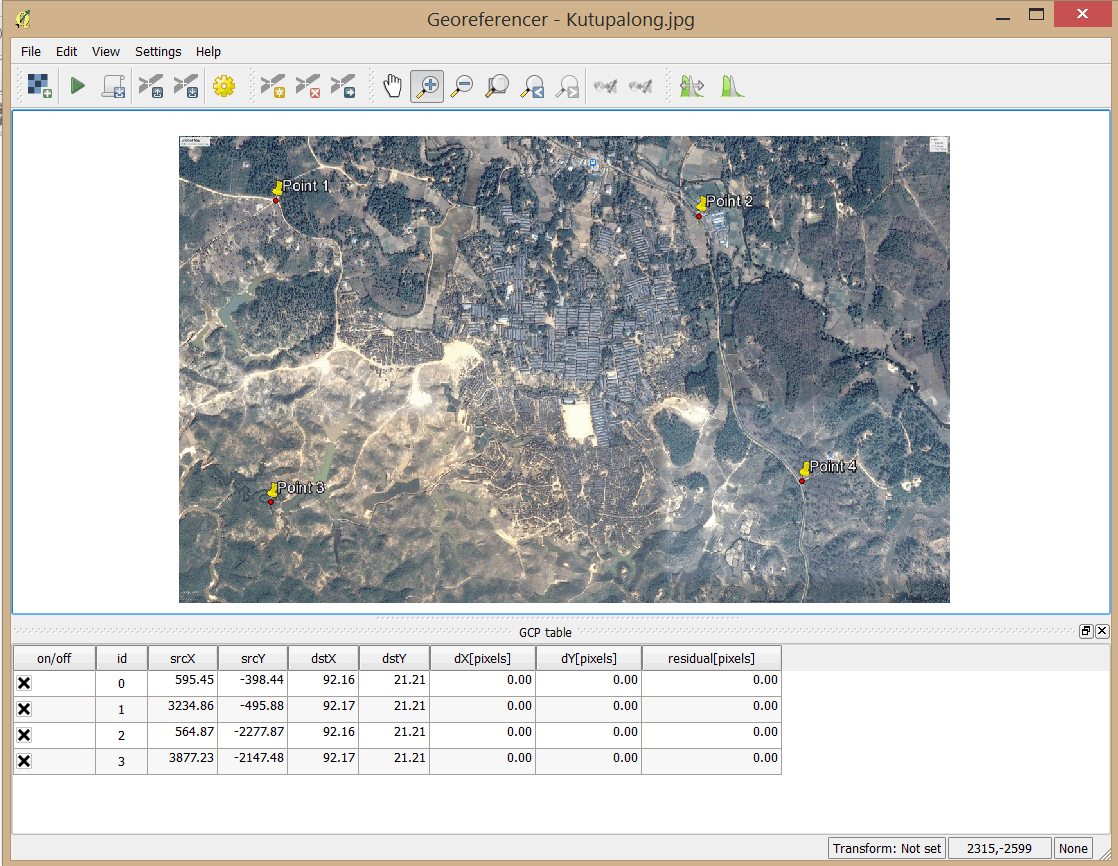
- Repeat this process for Point 2, Point 3, and Point 4 (repeat steps 41–49). Your GCP table should resemble the image below
- After you have added your control points to the image, you will transform the image into real world coordinates using the transform tool.
- On the main menu, click on the Transform button

- In the Transformation settings dialog box, set the Transformation type to Polynomial 1; set the Resampling method to Nearest neighbour.
- Save the Output raster in the MyExercises folder as Kutupalong_georef.tif.
- Ensure that the Target SRS is EPSG:4326.
- Select the option Load in QGIS when done.
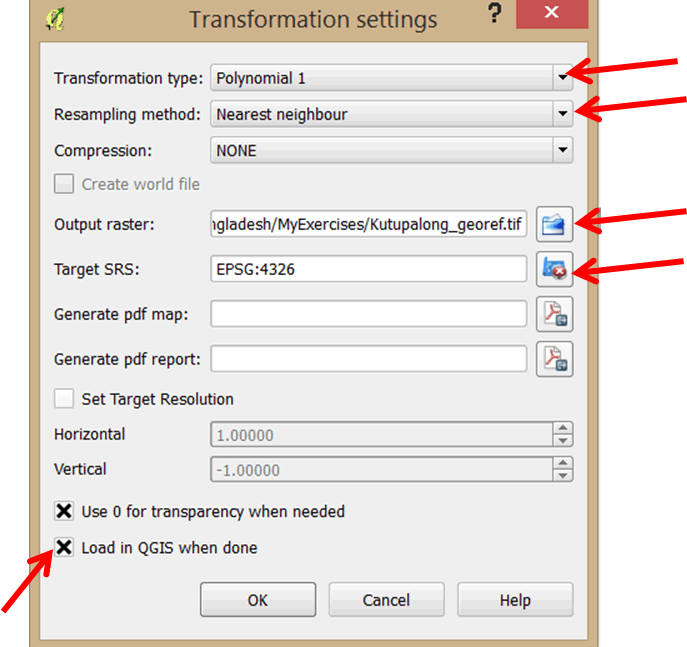
- Click OK
- Click the Start georeferencing button on the main menu to transform the image into real world coordinates

- Your georeferenced image is added to the main map window. Close the georeferencer. You can choose to discard or save the GCP points.
- Drag the point layer above the georeferenced image

- As you can see, the image has aligned well with the control points.
- The georeferenced image (raster layer) can now be overlaid with other geographic data. It can also be digitized using the crude image of the camp layout as a guide.