
GeoHealth Mapping GIS Training
for Monitoring and Evaluation or
Strategic Information Officers and Data Analysts for HIV

4.1. Collecting GPS Data
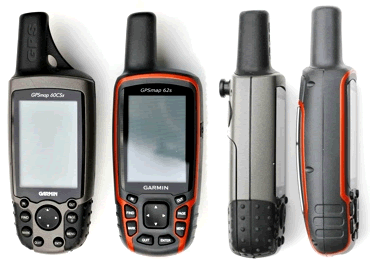
Global positioning system (GPS) devices are tools for collecting latitude and longitude and recording the location of objects. For example, a district health team might want to collect and record the latitude and longitude (or location) of each health facility to generate a master facility list (MFL). Using these data, the team could generate a map that shows the location of all facilities within a district.
This section includes instructions on downloading and using GPS data to create a map. If you do not have a GPS, proceed to step 4.1.5 and use the file provided.
4.1.1 Objectives
- Download data from GPS using two methods
- Convert downloaded data to shapefile format and open in QGIS
- Create a map using GPS data
You will need the files for Section_4_1 to complete this module.
4.1.2 Mapping sex worker point data
- Choose a site for your GPS field data collection.
- Collect 6–10 GPS locations for sites that have sex worker activity. Note the type of venue (hotel, club, restaurant) and the peak time at each venue.
4.1.3 GPS File Format
GPS devices store waypoints, routes, tracks, and other data in device-internal storage or in the device memory card. Most devices store data in GPX (GPS exchange format), an XML file format for storing coordinate data. This format makes it easy to process and convert to other formats.
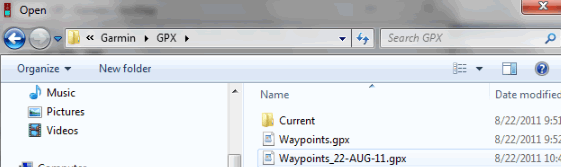
4.1.4 Accessing GPX files
- Connect the device to the computer using a USB cable.
- The device will mount like a flash drive after connecting, with a new drive letter; on a Mac, it will show on the desktop as a new drive. If you have a micro SD card fitted, that will show up as a second drive.
- There are a number of directories on the drive. Navigate to folder called \Garmin\GPX (for Garmin devices).
- Copy the GPX file with the same date as your data collection date to your working place.
4.1.5 Preparing the data
- Launch Microsoft Excel, then click on File > Open.
- Navigate to your GPX file and open it. Accept all messages that pop up until the file is completely loaded.
- Delete all columns on the sheet except for these three: Latitude (lat), Longitude (lon), and Location name (ns1:name7)
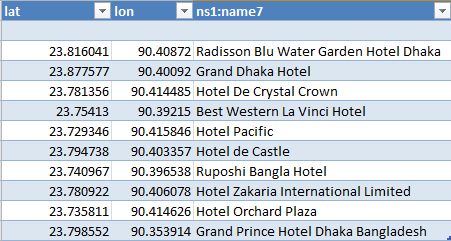 .
. - For multiple devices, make sure that all data migrated to Excel is in the same format (with same columns): lat, lon, ns1:name7.
- Append the data into one master sheet.
- Practice using these gpx files: HotelsNearDhaka.gpx and HotelsNearChittagong.gpx.
- Refer to Section 3.2.3 to load and view the data in QGIS.
4.1.6 Visual verification in Google Earth
- After collecting geographic coordinates for different locations, you can verify the coordinates using Google Earth.
- Locate the GPX files in the Garmin\GPX directory—it might be a different path for other devices—and copy them in your working folder.
- Launch Google Earth from your desktop.
- Navigate to Tools > GPS.

- Select Import from file.
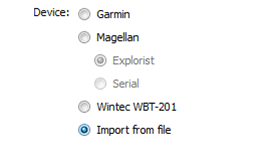
- Press the Import button and Select the GPX file to verify. The waypoints will display on the map. You can now verify visually.
4.1.7 Download and install OziExplorer
Another way to download GPS data is by using downloading software. There are various types of free downloading software available online. In this section, we demonstrate how to use OziExplorer, a free software that allows you to download/upload data from your GPS and export to various file formats.
To download OziExlorer, click on the link and follow the setup instructions.
http://www.oziexplorer3.com/eng/oziexplorer.html
Note that there are slight differences in the appearance of and displayed text in the OziExplorer based on the version, but the steps to perform are the same.
4.1.8 Launch OziExplorer
- Launch OziExplorer.
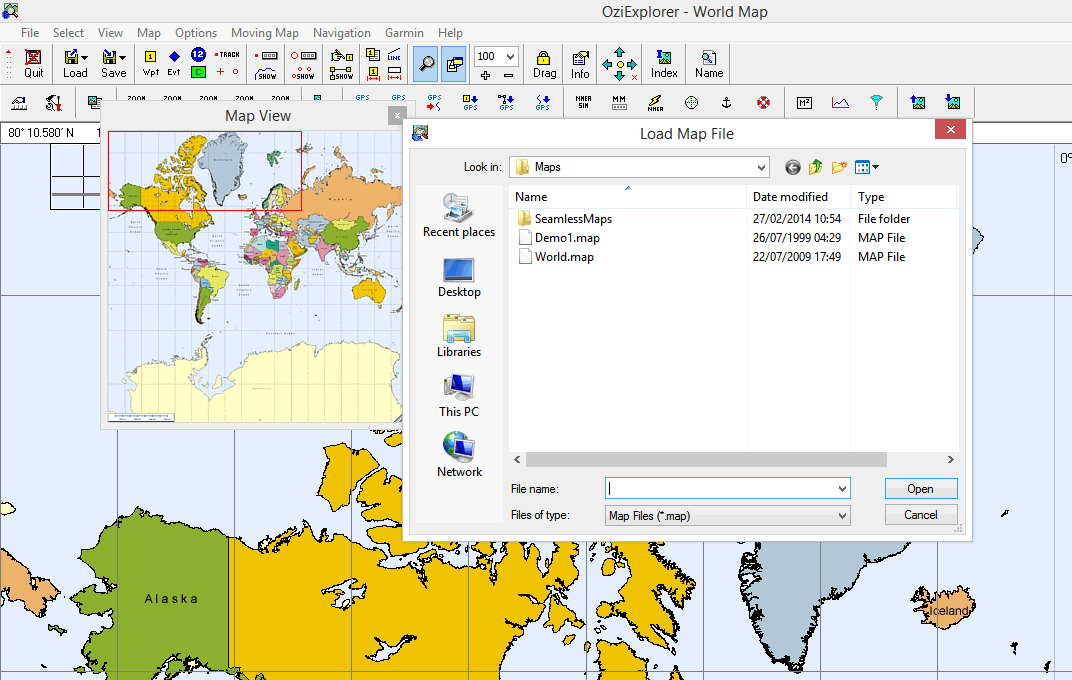
- The software should load and show a background map.
- If the background map does not load automatically, load the map file by clicking on File > Load From File > Load Map from File. Then, select World.map and click OK. Please note that you cannot work with OziExplorer if the background map has not loaded.
4.1.9 Download from GPS unit
- Connect cable to GPS and computer.
- Turn the GPS on.
- Check that OziExplorer is configured to the correct type of GPS:
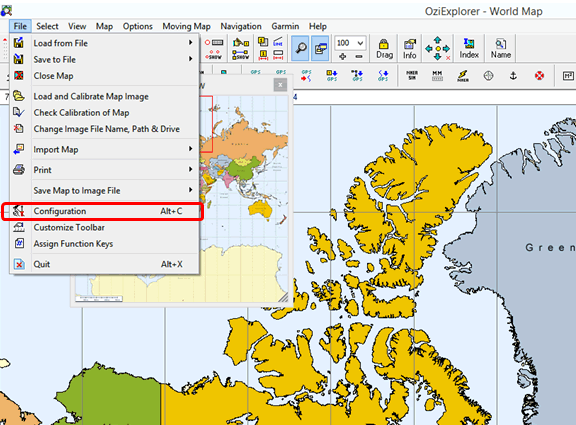
- Click on the File option on the top toolbar.
- Click on Configuration.
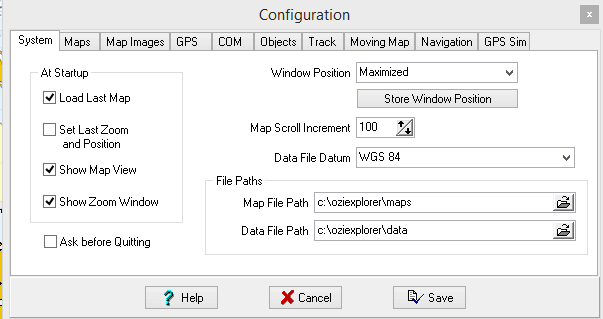
- On the System tab, ensure that the Data File Datum is set to WGS 84.
- You can also change the Default File Path for where you store your data files.
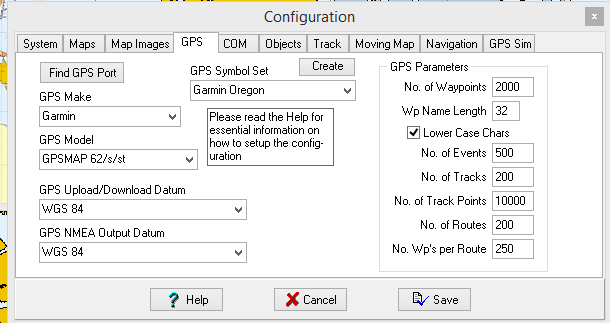
- Click on the GPS tab.
- Set GPS Make and GPS Model to match your GPS.
- The GPS Parameters section will update automatically.
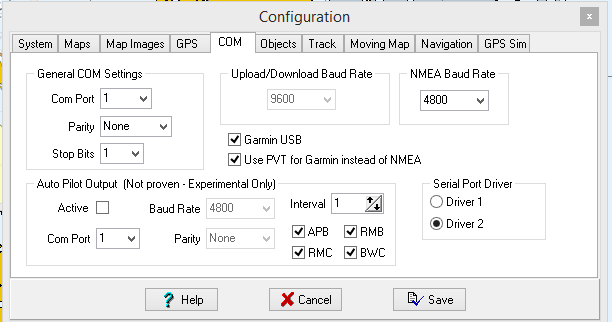
- Click on the COM tab.
- Select Garmin USB and Use PVT for Garmin instead of NMEA options. Click on Save to save your settings.
4.1.10 Download points from GPS
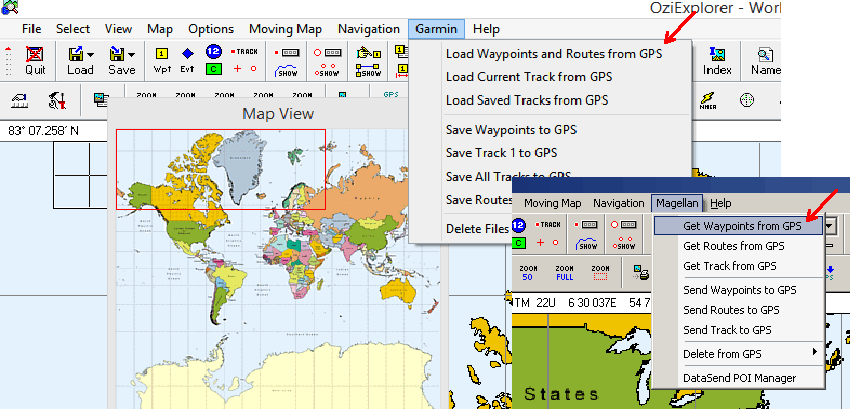
- From the top menu, click Garmin (or the name of the GPS you configured) then choose to Load/Get Waypoints from GPS.
- Give the computer time to download the data. At the bottom left of the screen, you will see Downloading Point x while it is in progress and Download complete once all points have been copied to the computer.
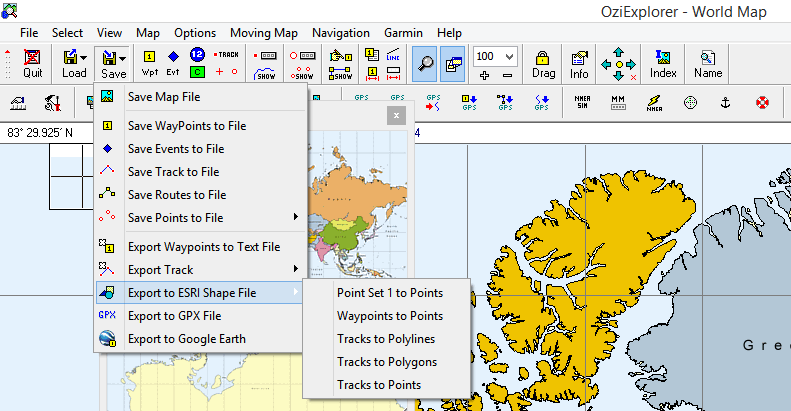
- Save waypoints to ESRI shape file.
- Click on Save > Export to ESRI Shape File > Waypoints to Points.
- The Export Shape File dialog box will open.
- Navigate to your folder and save the file. Use standard syntax for file naming, like hotspots_wpt_12_Feb_15.shp.
- Click Save.

- The Shape File Import/Export Options dialog box will appear. Here you can specify the output projection for the shapefile. We recommend using Lat/Lon for Position Format and WGS84 for Datum for most applications.
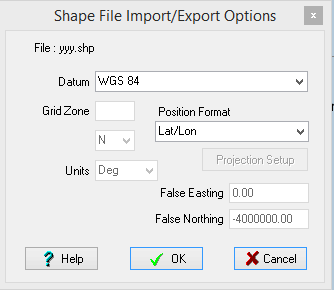
- Click OK.
- Now your shapefile can be opened in QGIS or in any other GIS software that uses shapefile.
- Save tracks to ESRI shapefile using the same process.
- Repeat from step 35, choosing this time to Load/Get Tracks from GPS.
- Then at step 38, select File > Save to File > Export to ESRI Shape File > Tracks to Polylines.
- Use standard syntax for file naming, like hospitals_trks_13_Oct_14.shp.
- It is recommended that you use the abbreviated words 'wpt' or 'trk' in your file name to differentiate between waypoints and tracks. You can also use the full name if you wish.
Notes
- When processing your Garmin data, you will notice that the shapefile attributes of date and time may be the "current date and time" of processing and not the date and time of the waypoint collection. This seems to be an unfortunate oversight of the manufacturer. With an eTrex Legend, this is true for waypoints. However, tracks do maintain true GPSdates and times. Track features with the current time/date are simply connecting gaps. You might consider adding the correct acquisition dates once the file is in QGIS.
- You can import shape files into OziExplorer to upload to your GPS.
- On the main menu click on Load > Import ESRI Shapefile > points or polylines or polygons > browse to the folder where your shapefile is and select OK. It takes a while to load large files.
- Once your shapefile is imported to OziExplorer you can upload the points or tracks to your GPS.
- Connect your GPS to your computer using the cable provided.
- Click on Garmin on the main menu > Load waypoints to GPS or Load tracks to GPS